The Iot Cane
The IoT Cane is a piece of attrezzo I used in my vampire custom. It has a ball full of lights (LEDs), an accelerometer to detect taps, a big battery so it last all night long and a microcontroller with BLE. This is history of the making-of, I hope you enjoy it as much I did when making it.
Let’s start in chronological order, and follow the process as I was doing it.
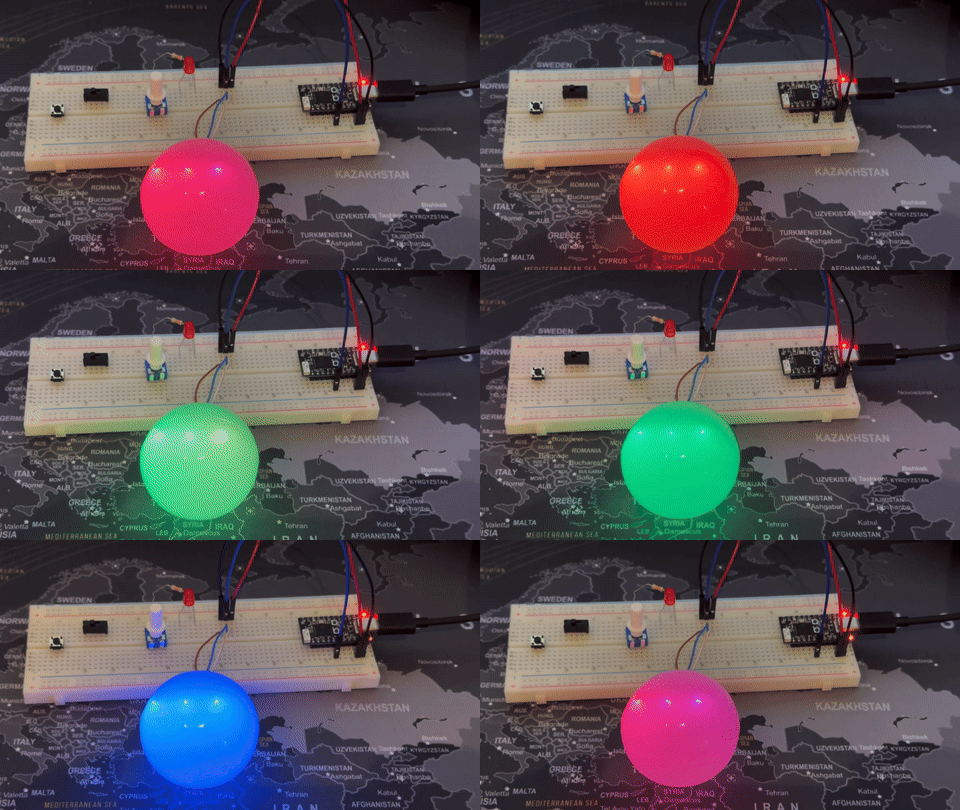
First thing was to validate my hypothesis that you could dip a LED strip in epoxy resin and it will continue working. This was almost a given, as standard LEDs use epoxy as case, but I needed to make sure that my process wouldn’t change anything.

The first prototype was done with only 3 LEDs and the board with the microcontroller was a different one, this one is too big and has wi-fi (which I was not going to use). Anyway, was enough to confirm feasibility, once I know I can put a LED strip in epoxy resin and still works, the rest is known territory…
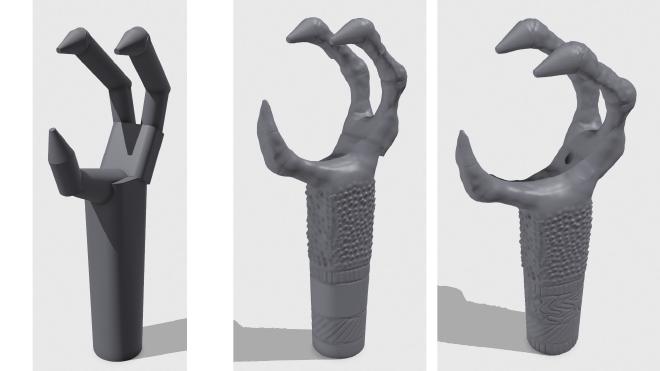
With the basic idea in mind I started the design process. I’ve used two great apps on the iPad: I like to design things while lying back in front of the TV. The first one is a CAD app with great capabilities, Shapr3d. I used it for creating the rough form that I wanted, just using geometrical forms: cones, boxes and cylinders. Then, I used a sculpturing app, Nomad Sculpt, for the fine o details and more organic view. I had tgo from one app to the other a couple of times, to make sure the space for the ball would be just right: enough room so it fits, not too loose that it falls. The last touch was to add cutouts for the cables and components.

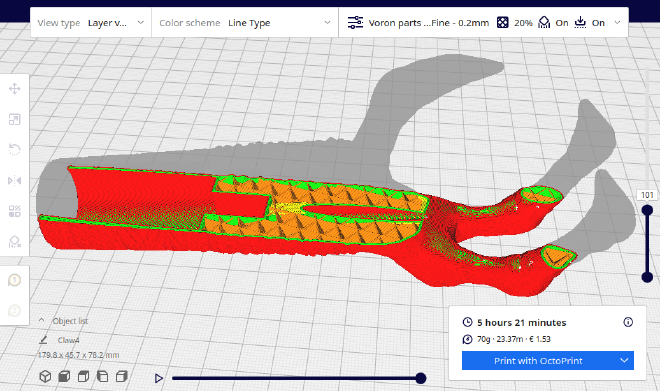
Next step is to move from the digital world into reality: 3d print it! That’s straightforward, just export the design in a compatible format, like 3mf and process it with a slicer, I use UltiMaker Cura. The important part at this point is the orientation, you don’t want to print it standing vertically: the weakest point is the union between layers and printing vertically means they would align with the stick of the cane, and it could break with a strong enough lateral hit.

The rest of parameters are less important. I printed it with 20% of infill, to save some filament. It would definitively need support, I used tree structure support because there are overhangs that are not directly over the plate, and I don’t like support over the model. Tree support can have the base on the buildplate and move below the overhang as the height permits.
I have to print it a couple of times because real world is not as precise as in the digital world, and the opening for the stick was not big enough. Just a quick visit to the CAD surgeon and hole is a bit wider.
Final step is to paint it. I needed help for this part and went to visit a friend. I was expecting to get it painted by a professional, but instead they just offered me the air brush and guided me during the process. It was my first time with an air brush, but with great advice and some patience, I believe I didn’t do a bad job:
With the claw finished, it’s time to move into the electronics. I chose an XIAO nRF52840 Sense board because is really small but still it packs a lot of functionality: it has BLE, IMU and battery management. The problem is documentation, Seeedstudio is a cheap brand focused on having a good characteristic sheet. Once they sell the product they don’t provide much support, they just try to build boards that are compatible with existing libraries from other brands, like Adafruit. I ended up using almost all libraries from Adafruit.
The code itself is pretty simple: it just setups Bluetooth to receive connections (handled by the nice library from Adafruit), it configures the IMU to raise interrupts on taps and updates the LEDs based on mode or action detected. Also a battery level is provided through bluetooth.
Whenever a tap is detected, we start counting taps to do different things: 1 tap just flashes the LEDs with the current color, 2 taps selects a random color, 3 taps enters flashlight mode and 4 taps resets to default values. Timeout for these taps is one second, any following taps would start a new count.
Flashing current color means, turn on LEDs at 50% intensity and decrease a 10% of current intensity every 50 milliseconds (20 times per second) which gives about 1.2 seconds of dimming out.
Flashlight mode is turning on all LEDs in white color at 70% intensity, permanently. In this mode, taps will not flash the lights, but they will be counted to change mode: 2 taps would choose a random color and start flashing LEDs in taps, or 4 taps would reset to default red color and flashing mode.
The code and the model are available in Github.
The final assembly #
For the final product I went with a 60 millimeter epoxy resin ball, with a few drops of white coloring. I wanted to diffuse a bit the light, but I didn’t want to dim too much the LEDs, but it looks like that it wasn’t just enough, you can see through and to the LEDs. The ball has 11 neopixel (technical name WS2811), 8 making a ring and 3 facing forward. They are all in a single chain for easier management. Being in a single chain is great because it means that you can control all of them with just 3 wires: 2 for power and 1 for commands. The power is connected directly to the battery, as I don’t think this small board would support the amount of current that 11 LEDs could draw at max power.
The battery is a 18650 with 3400mAh of energy. It provides enough power to use flashlight mode for more than 5 hours of continuous use. The board has a battery management chip that will charge the battery when connected to power, but it outputs only 100mA (in high current mode) so it can take a while to charge it completely.
The stick is a 1-meter PVC pipe with 25 mm external diameter and 21mm inside, which is perfect to hold the battery. I used a screw to stop the battery to falling all the way to the bottom with al the tapping. I screwed it perpendicularly, just below the battery and used a foam material on where the battery would seat, to not damage it. Then, I used a rotary tool to remove the screw head. I painted the stick with a black spray and put a rubber foot for a more professional look.
Back in a bit!